
Here’s a step-by-step guide to creating your first Futures Grid Bot on Bybit.
Create a Futures Grid Bot
View Your Futures Grid Bot
Modify Futures Grid Bot Parameters
Withdraw Futures Grid Bot Profits
Terminate Your Futures Grid Bot
Create a Futures Grid Bot
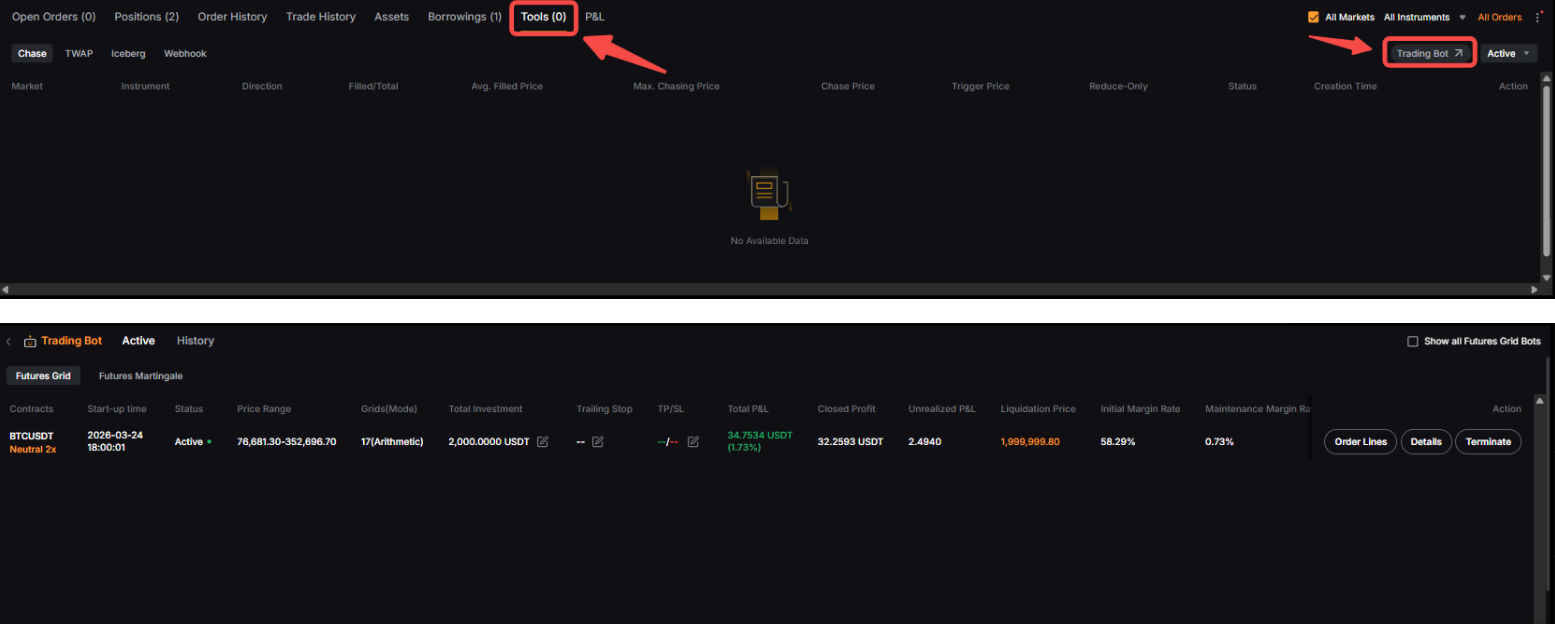
Step 1: Please click on Tools → Trading Bot in the navigation bar to enter the Bybit Trading Bot page.

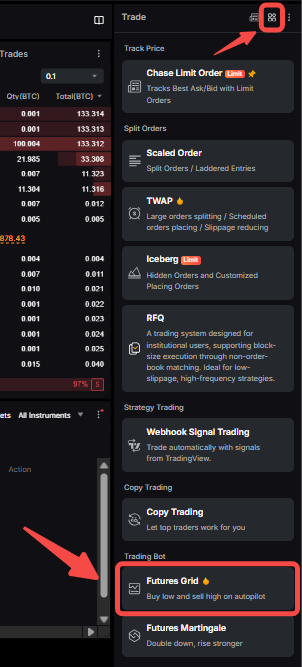
Alternatively, on the Futures Trading page, navigate to the order zone on the right side and select Tools → Futures Grid.
Step 2: Create your Futures Grid Bot by clicking on Create to go to the Create Futures Grid Bot page.
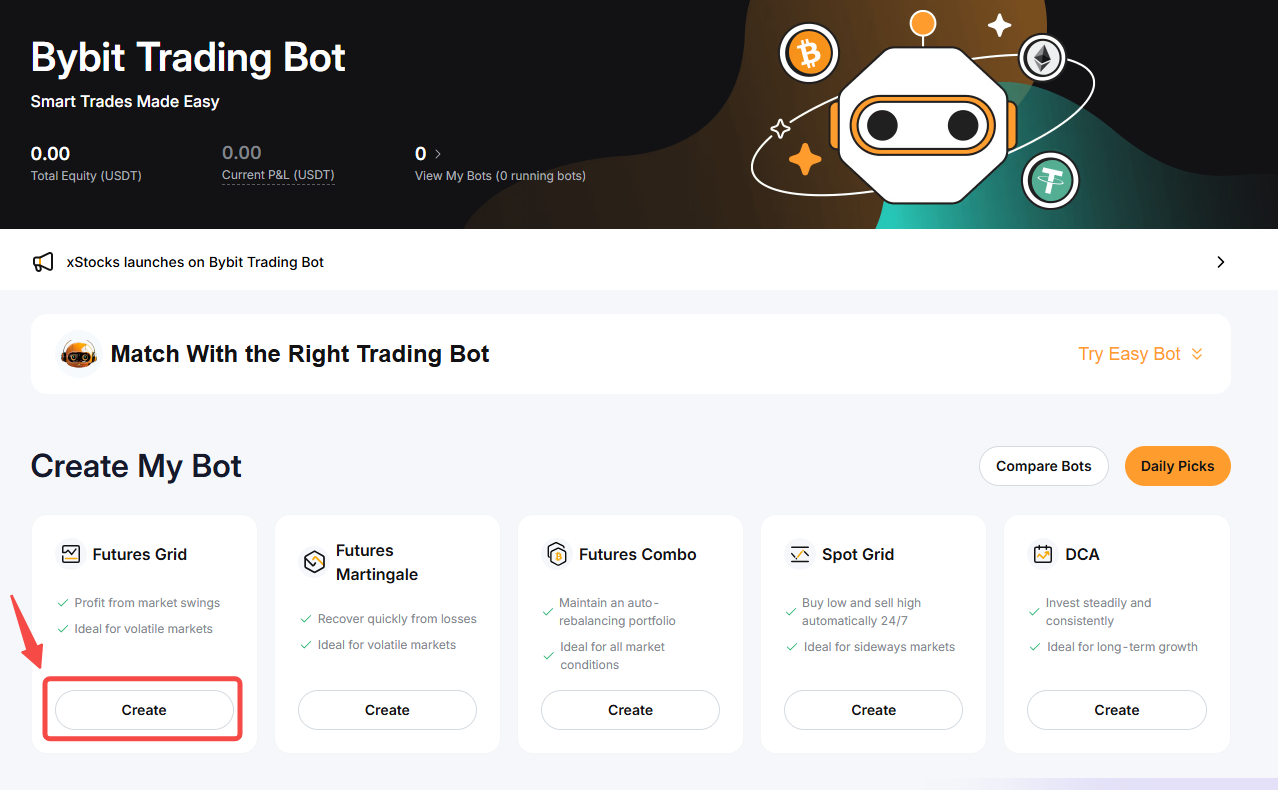
Note: You can create up to 50 Futures Grid Bots.
Step 3: You have two (2) options for creating Futures Grid Bots.
1. Manual
You can create a manual Futures Grid Bot via both the Trading Bots Page and the Futures Trading Page.
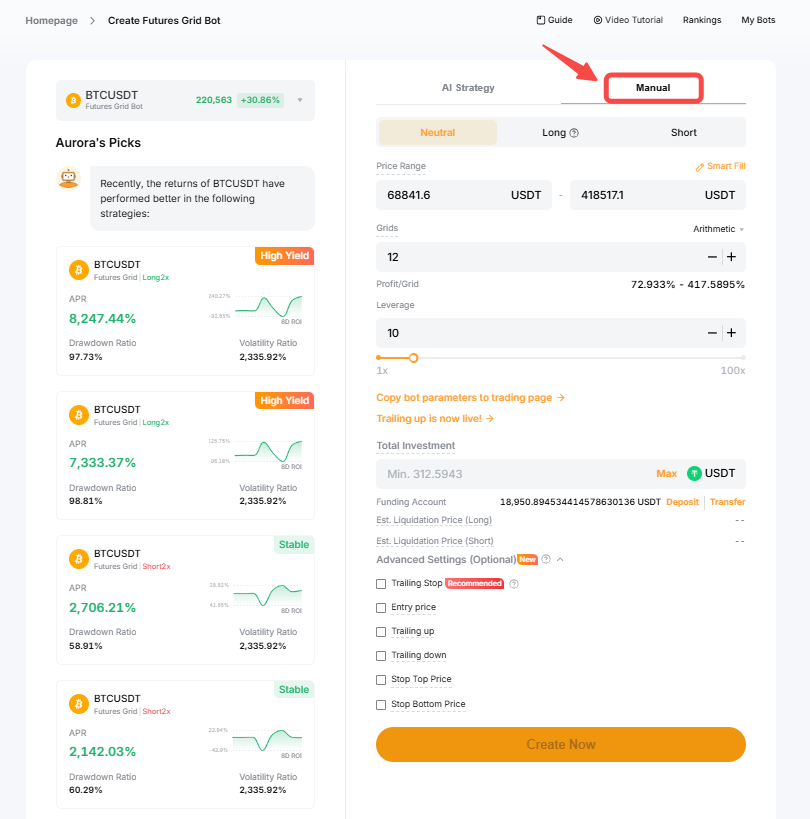
2. AI Strategy
Please note that the AI Strategy mode is only available when you create your Futures Grid Bot via the Trading Bots Page.
By using AI Strategy, the system will suggest the parameters based on the historical data performance of the Futures trading pair. Alternatively, you can also refer to the suggestion from Aurora’s Picks to create a Futures Grid Bot based on your preferences.
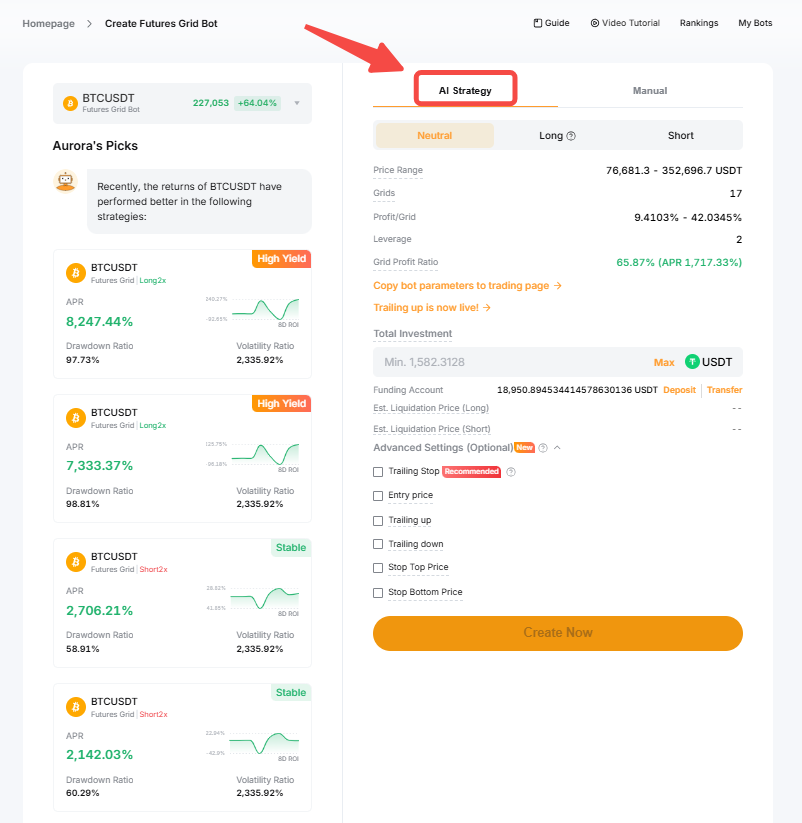
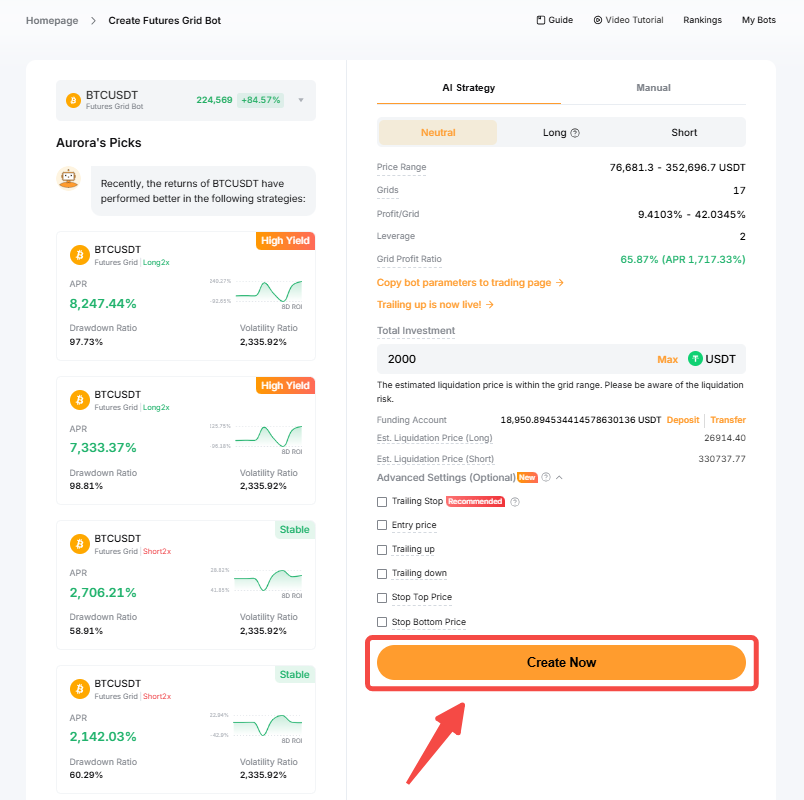
Then, click on Create Now.
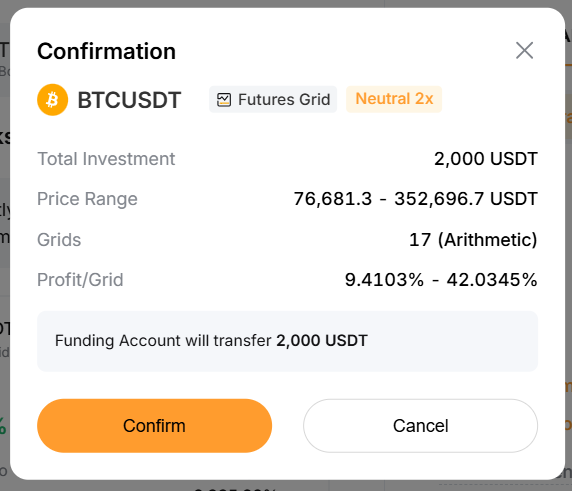
Step 4: Please double-check the grid bot information you’ve created, and then click on Confirm to start trading.
Your Futures Grid Bot has been successfully created! Once you have created trading bots, you can view the Total Equity (USDT) and Current P&L (USDT) at the top of the Bybit Trading Bot page.
View Your Futures Grid Bot
After you click on Confirm, the page will automatically redirect to My Bots for you to view your active grid bots.
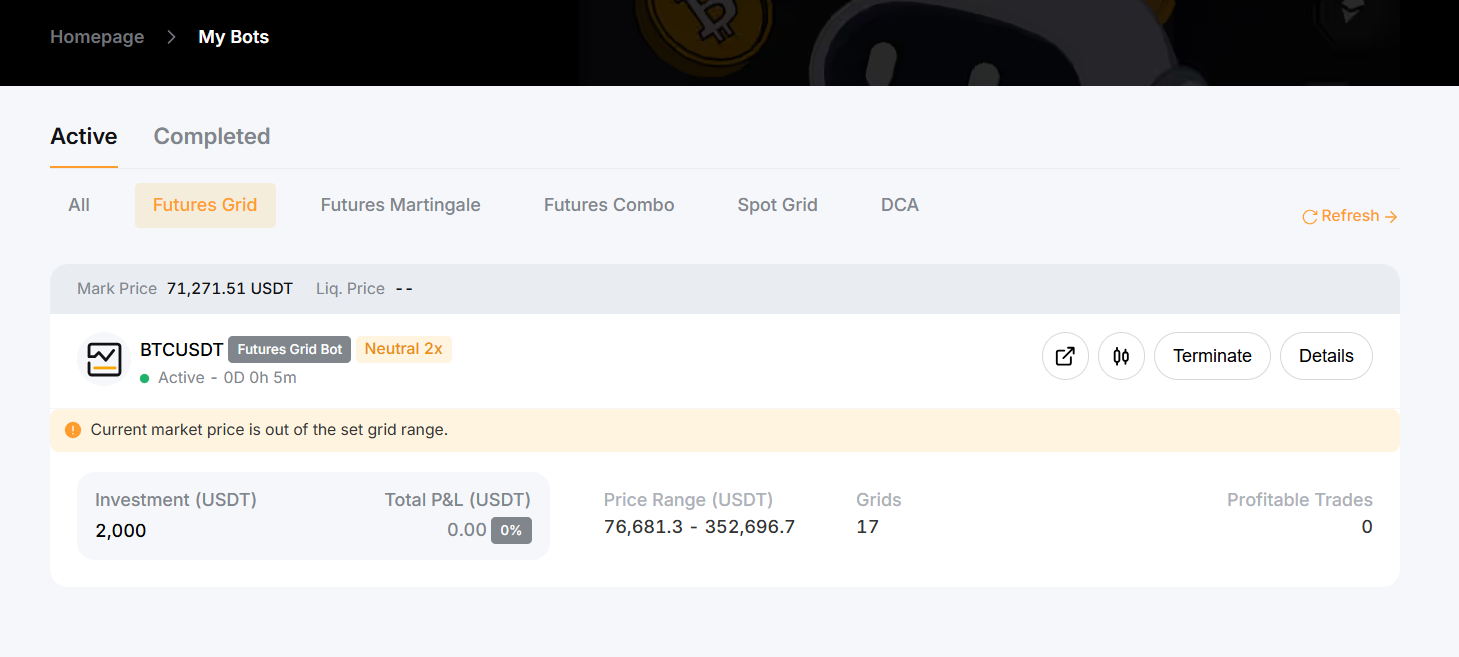
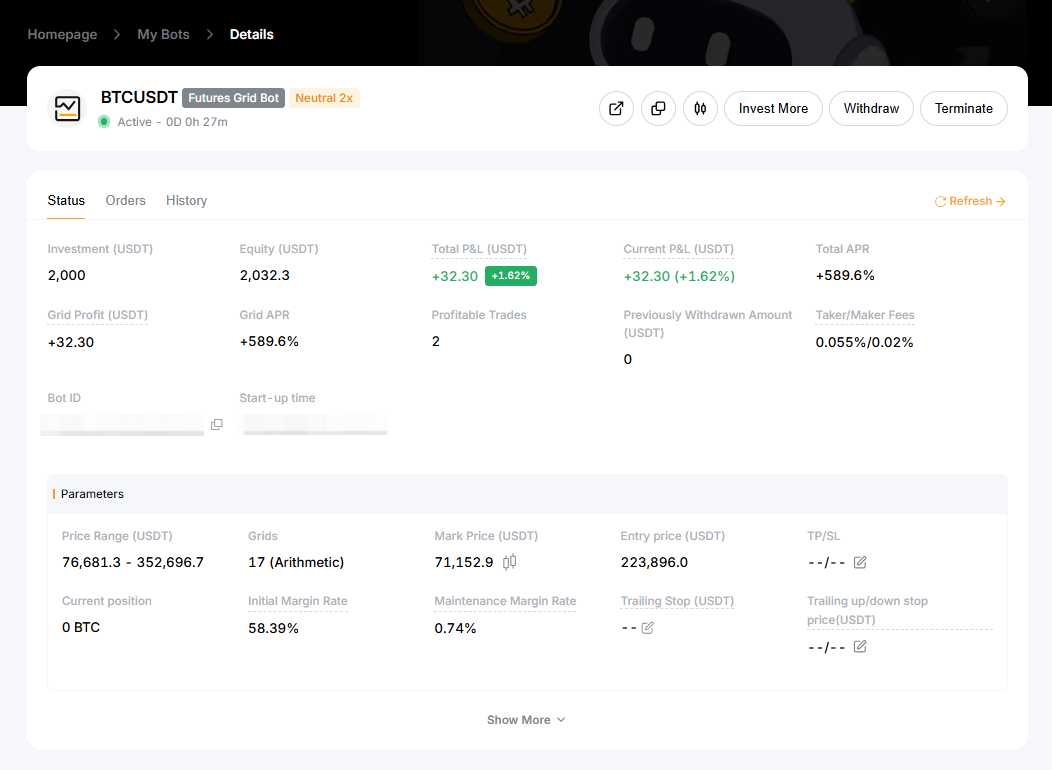
You can click on Details in the upper right corner of the grid bot you wish to view to explore more information, including the current status of your Futures Grid Bot, current orders under the Orders tab, and your order history.
You can also see your active or closed Futures Grid Bot details on the Futures Trading pages by clicking on Tools → Trading Bot.
Please note that the calculation formulas for Total P&L and current P&L are as follows:
— Total P&L = Realized P&L + Unrealized P&L
— Current P&L = Realized P&L + Unrealized P&L − Cumulative Withdrawn Grid Profits
— Realized P&L = Realized Grid Profit - Fees
— Unrealized P&L = floating P&L from partially executed grid orders and positions that haven't fully closed
To learn more about profit and loss calculations, please refer to P&L Calculations (Futures Grid Bot).
Modify Futures Grid Bot Parameters
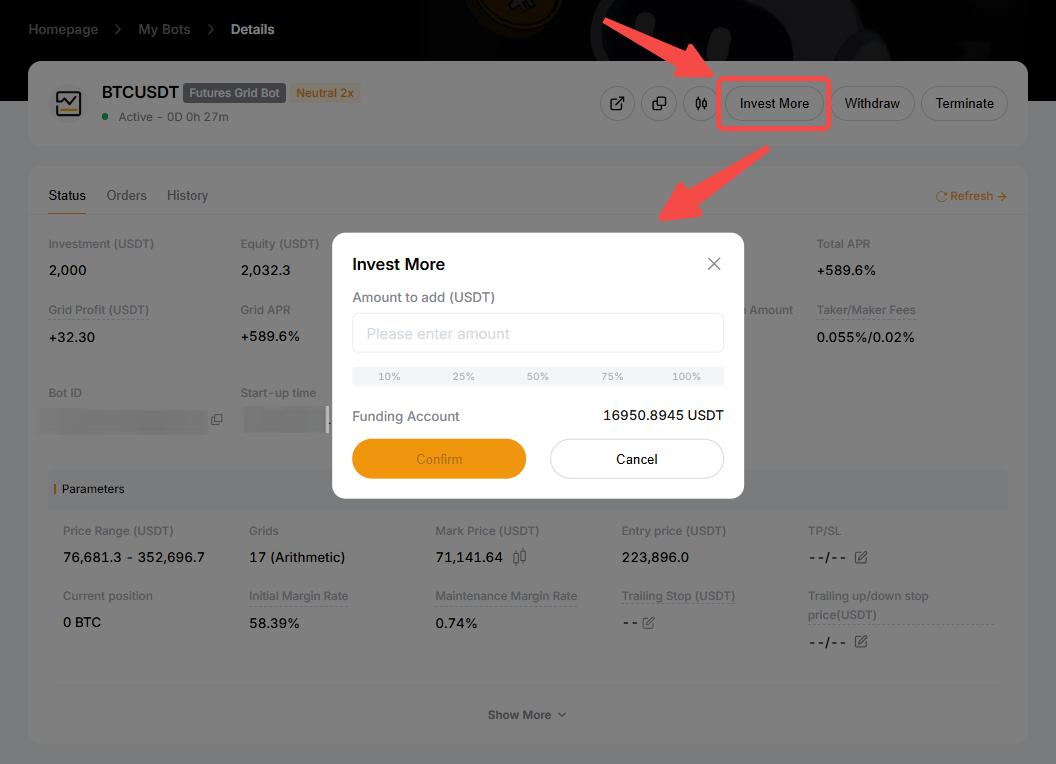
Once your Futures Grid Bot is created, you will be able to invest more funds into the Grid Bot by going to the details page of your Futures Grid Bot and clicking on Invest More.
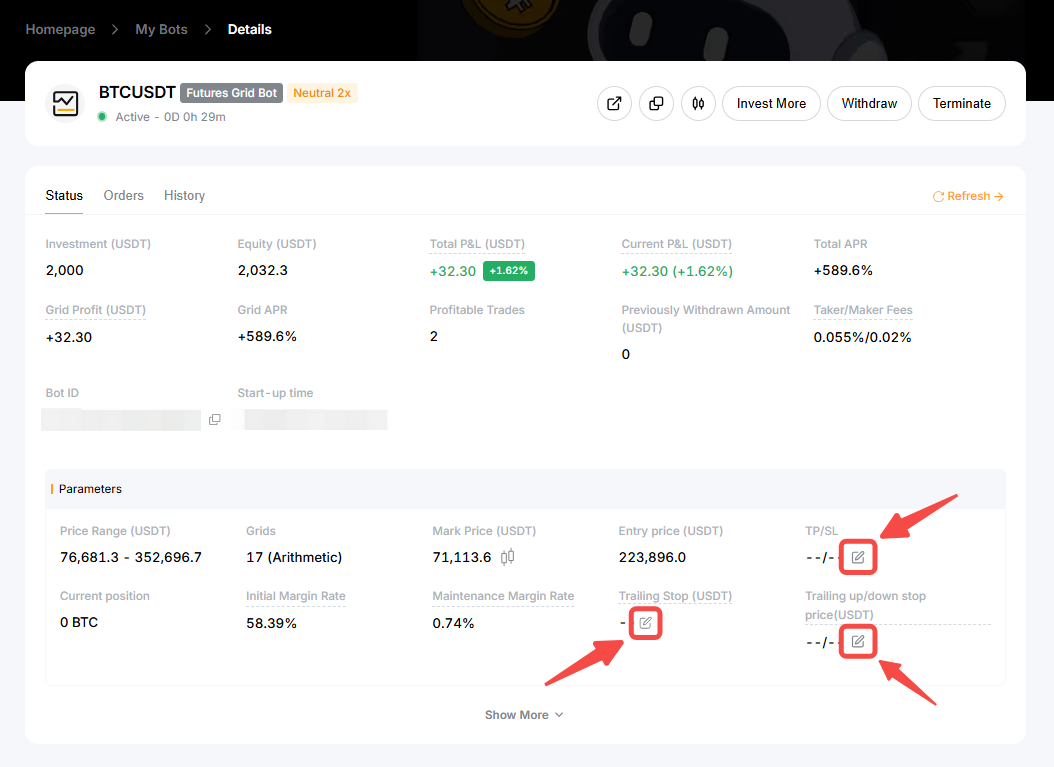
You can also modify the advanced settings of your Futures Grid Bot such as the TP/SL, Trailing Stop and the Trailing up/down Stop Price by clicking on the edit icon next to the relevant fields.
You have successfully modified your Futures Grid Bot parameters!
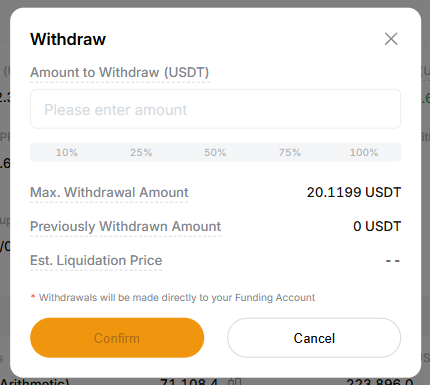
Withdraw Futures Grid Bot Profits
To withdraw your Futures Grid Bot profits, go to your bots Details and click on Withdraw.
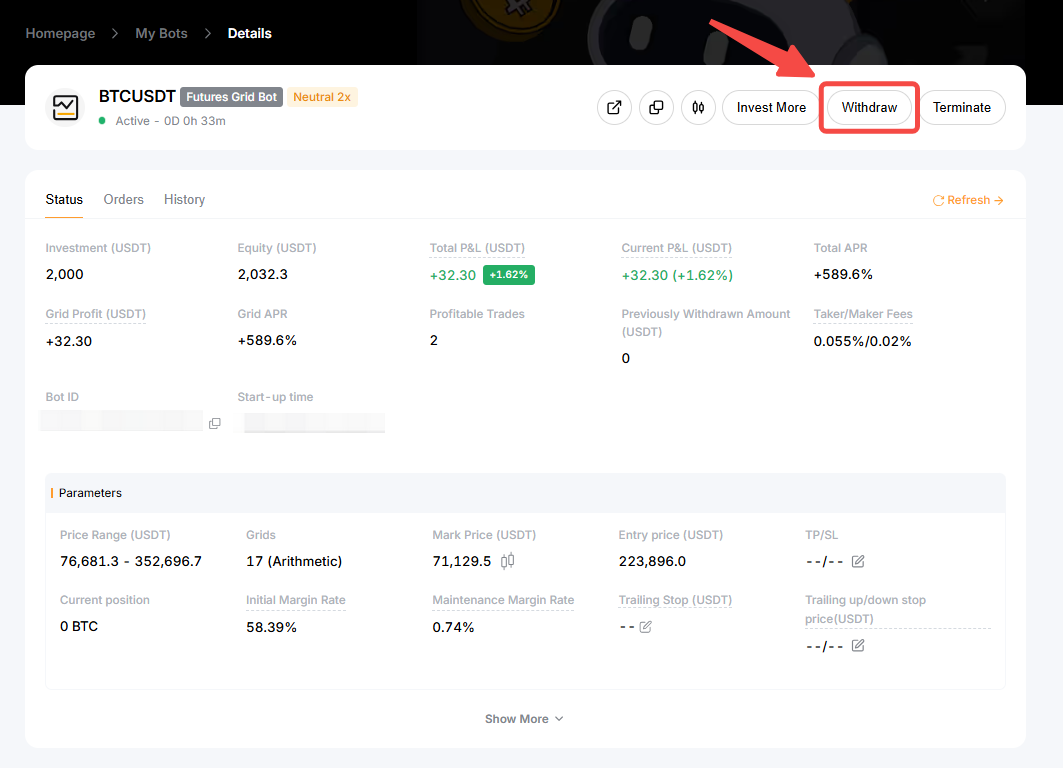
The maximum amount that can be withdrawn is your grid profit after the fee deduction. You can refer to the Max. Withdrawal Amount which is displayed on the withdrawal window. The withdrawn amount will be credited to your Funding Account.
Terminate Your Futures Grid Bot
To terminate your Futures Grid Bot, go to the details page of your Futures Grid Bot and click on Terminate.
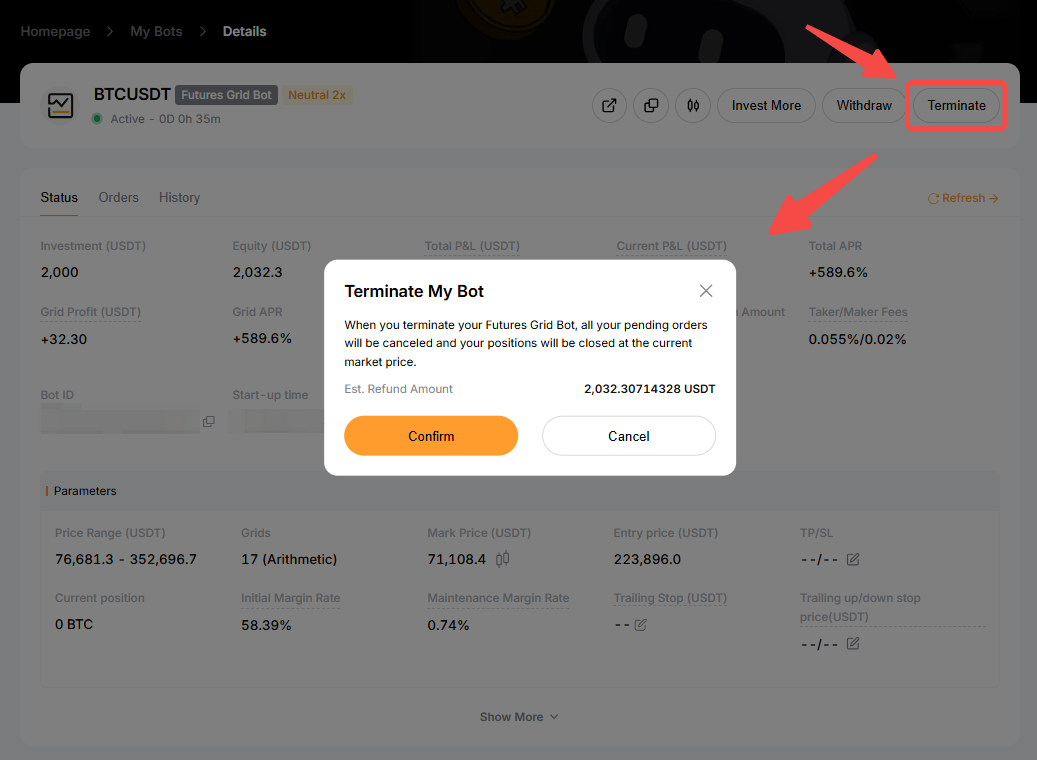
Once the bot is terminated, all pending orders will be canceled, and your funds will be returned to your Funding Account.